Quick Summary
Conveyor metal detector false alarms can come from belt splices, moving metalwork, vibration, electrical noise, static discharge, or changes in the material signal. First find out whether the event started in the detector, the material, or the line control system. Then use its timing to choose the next test.
An alarm with no visible metal is still an unresolved event. The target may be small, buried, or farther along the belt than you expect. A metal clip in a splice is also a real metal signal, even if it is an unwanted interruption to production.
For bulk conveyors, the aim is stable operation while still detecting the metal that can damage the next machine. Fewer stops alone do not show that the problem is fixed.
Where should you start when a detector keeps alarming?
Start with the event record and the material involved, before changing sensitivity. Separate a metal-detection event from a detector fault, a power interruption, or a stop generated elsewhere in the control system.
Save the controller message, event time, settings, belt speed and load condition. If the system has a signal trace, save that too. Ask what changed just before the trouble began: a belt repair, a new idler, a different material, a drive change or work near the sensor.
Did the detector actually send a metal signal?
Compare the detector indication with the stop reason in the programmable logic controller (PLC). A conveyor can stop because a fault contact changed state, even when no metal event was recorded. On a line with automatic rejection, a reject-confirmation fault is another event to distinguish from the original detection.
Have the controls technician trace the sequence from detector event to output, PLC input and final action. Use matching timestamps or an approved signal recording method. A lamp seen after a stop may not show which event happened first.
Was the right material searched?
Search the material that passed the sensing point at detection, allowing for movement before the belt stopped. The material beside the detector after shutdown may have arrived there later. Use the installed marker or event-position record when available; otherwise, use the line’s measured stopping movement to identify the area to inspect.
Recover suspect material through the site’s controlled removal procedure. Keep any metal found with the event record. Its type, dimensions and shape may explain why the detector responded when a quick visual search did not.
Before touching the belt, idlers, guards or wiring, stop and isolate the relevant equipment against restart. Electrical work belongs to qualified personnel. Keep guards and protective earth connections in service; never bypass the detector to make a test easier.
What does the alarm pattern tell you?
The pattern tells you where to investigate first. It does not identify a failed part by itself. Compare alarm times with belt movement, loading and nearby machine events.
| When the event occurs | Investigate first | What helps separate the causes |
|---|---|---|
| At the same belt position on each circuit | Splice, embedded metal, repair or buildup | Compare the event with a belt reference mark observed from a safe position. |
| When a motor, drive or welder operates | Electrical noise or a mechanical jolt | Match the detector signal to the equipment event and observe whether the sensor support also moves. |
| Only when material is loaded | Material signal, buildup or movement under load | Compare material condition and depth with belt clearance and nearby structure movement. |
| During starts, stops or heavy impacts | Sensor mounting, vibration or changing metal contact | Compare with steady running at the same working settings. |
| With the belt stopped and empty | Nearby activity, power, cables or detector condition | Record whether other equipment operates or metalwork moves at the same time. |
| Soon after maintenance or cleaning | Changed belt, brackets, insulation, cables or moisture | Compare the changed parts and settings with the last stable arrangement. |
Keep the initial comparison simple. Change one permitted condition at a time and record the result. If belt speed, material and sensitivity all change together, a quieter detector will tell you little about the original cause.
Why does it alarm once per belt revolution?
A repeat at the same belt position points first to something traveling with the belt: a metal splice, fastener, embedded fragment, repair or local buildup. Record that position before replacing parts.
Use the total belt loop length, including carrying and return runs, and the actual belt speed:
Belt circuit time in seconds = total loop length in meters ÷ belt speed in meters per second.
For example, suppose the loop is 96 m long and the belt runs at 1.6 m/s. One circuit takes 96 ÷ 1.6 = 60 seconds. Events about 60 seconds apart during steady running justify following the same belt section through another circuit. If an authorized operating change takes the speed to 3.2 m/s, that section returns every 30 seconds.
Use running time, excluding stops. Conveyor center distance is not the full loop length, and a drive’s frequency display is not automatically a belt-speed measurement. If there are several repairs or splices, there may be several events per circuit.
After isolation, inspect the identified section on both sides and at the splice. Metal trapped inside a repair may not be visible. Clean an affected area, then repeat the observation under the original conditions to see whether the event follows that section again.
For an existing conveyor, our LJT-B tramp metal detector has a split frame for retrofit installation and an optional splice detector. Send the splice details before specifying that option. Ask how splice recognition affects inspection during the joint’s passage, and test the required target through that part of the operating cycle. An optional splice device does not establish compatibility with every metallic belt or joint.
How do vibration, nearby metal and current loops cause trips?
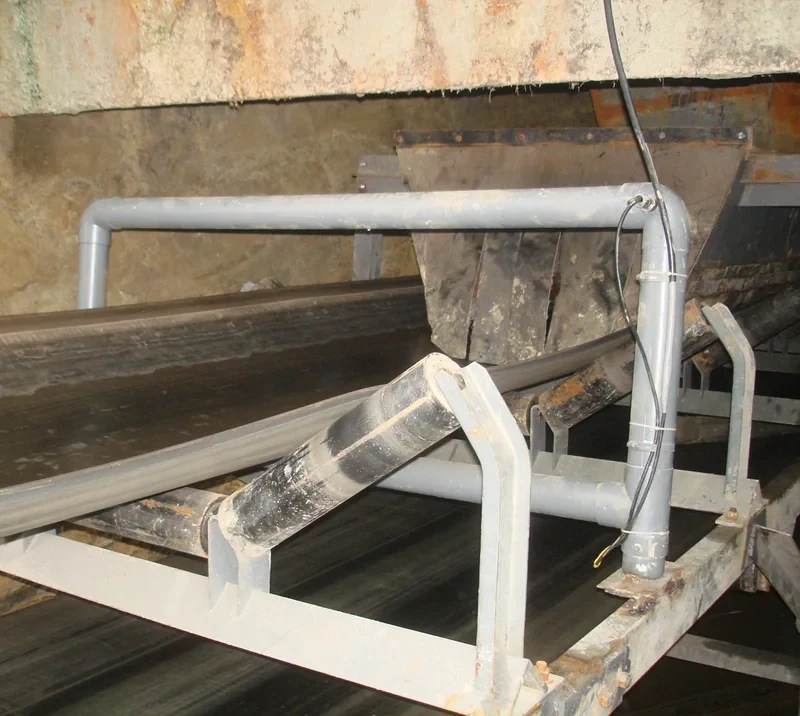
Metal moving near the sensing area can change the detector signal. Loose conductive joints can also disturb it as their electrical contact changes. These are different problems, although both may appear during vibration.
A loose guard, chute edge or idler support can move when material hits the conveyor. Stainless steel and aluminum parts also deserve attention. Replacing a steel bracket with another metal does not automatically remove the interference.
Compare the installed layout with the detector’s required clearance for fixed and moving metal. Use the clearance for the actual detector and installation. There is no single distance that suits every frame, aperture, sensitivity setting and nearby object.
A current loop is a closed conductive path through surrounding metalwork. Where a bearing or loose joint repeatedly makes and breaks contact, the current can change and disturb detection. Anritsu’s technical note on moving metal and induction demonstrates both effects and explains why even unpowered nearby equipment can be involved.
After isolation, have maintenance staff examine looseness, damaged mounting parts and changes to the support structure. Restore the specified mounting arrangement. If a conductive path needs bonding or isolation, the detector and conveyor specialists should choose the location and method together. Protective earth must remain intact. Breaking an unwanted loop and providing a safe path for static discharge are separate design tasks.
Can drives, power noise or static cause false alarms?
Yes. Electrical interference can reach a detector through nearby fields or its supply and wiring. Static discharge is another possible source. Start with the equipment events that repeatedly line up with the alarm.
Save a short timeline showing detector events beside drive starts, speed changes, contactor operation and nearby welding. Use the same clock where possible. If a motor start coincides with both a signal spike and visible frame movement, keep electrical noise and mechanical disturbance as separate possibilities.
A qualified technician can review cable routing, shields, connectors, supply quality and the specified earthing arrangement. The question is what changed and which path carries the disturbance. Randomly adding ground wires or changing drive parameters can create new problems.
Anritsu’s technical note on electrical noise describes radiated, conducted and static noise, including experiments with inverter interference. Its model-specific noise settings are not universal detector functions.
Static deserves attention when dry conveying conditions or changed belt/contact materials accompany the trouble. Describe where rubbing and possible discharge occur. Use a compatible static-control arrangement; do not fit a conductive belt or filler near the sensor solely because it is sold as “antistatic.” Its electrical properties must suit the detection system.
After any electrical correction, repeat the same permitted equipment sequence with the detector at its working settings. A different shift with different machines running is a weak comparison.
Why is it stable empty but unstable with material?
Loading changes both the material inside the sensing area and the mechanical load on the conveyor. Separate these two effects before changing the product setup. An empty-belt result alone does not tell you which is responsible.
Some wet, conductive or mineralized materials create a background signal. This is often called product effect. Changes in moisture, composition, depth or presentation may move that signal outside the range used during setup. A new batch can therefore behave differently even when no loose metal is visible.
At the same time, a loaded belt may sag, a chute may move, or buildup may bring the belt or material into contact with the detector assembly. Record both the feed condition and the physical clearances under load, using safe observation positions. A load-related alarm is not automatically product effect.
Compare a stable run with a troublesome one. Record the material source, moisture information available, normal and peak burden depth, speed, and whether loading is smooth or comes in surges. Where material learning or compensation is available, use representative normal material and the correct procedure after mechanical and electrical faults have been addressed.
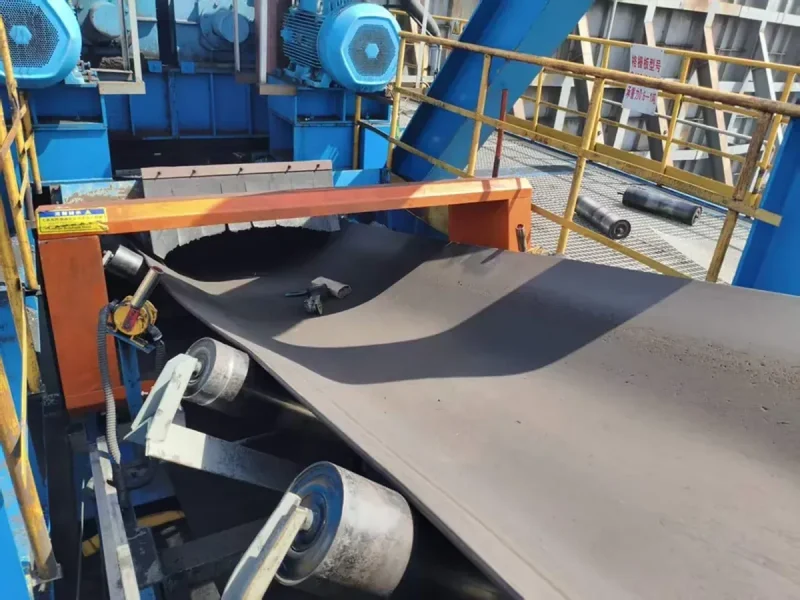
For an underbelt installation such as our LJT-H underbelt conveyor metal detector, record the sensor-to-belt gap and target height within the load. A deeper target or larger gap can make detection harder. That loss of sensitivity is different from a false alarm; turning sensitivity up to recover it may also expose background noise.
Use the real target and the deepest normal load when reviewing an underbelt arrangement. If the installation cannot meet both the detection need and stable operation, revisit the sensor position or detector layout rather than continuing to adjust the threshold.
Should you lower sensitivity or replace the detector?
Fix the identified belt, installation or interference problem first. Change sensitivity only against a defined detection requirement, and keep the detector if it can meet that requirement reliably.
Save the original settings. Define the required target by metal type, size and shape, then record its position, belt speed and material condition. A large bolt passed close to the sensor is a poor substitute for a small target buried in the working load. A sphere also does not represent every orientation of a wire or strip.
Once the cause has been corrected, a trained person can carry out the detector’s allowed setup process. Record each setting change and repeat the target test. If reducing sensitivity removes nuisance events but loses the required target, the line has traded away protection.
Keep the current detector when the corrected installation runs stably and the full response works with the required targets. Consider relocation when surrounding steel, movement or electrical equipment cannot be kept within the installation limits. Consider another detector arrangement when the belt construction, material signal or target distance remains incompatible with the job.
Our conveyor metal detector range includes different installation layouts. Choose between them using the conveyor and target test conditions, rather than assuming a newer controller will cure an unsuitable sensing location.
How do you prove the repair worked?
Show both stable running and reliable detection with the required line action. Test under the conditions that previously caused trouble. A few quiet minutes with an empty, stationary belt do not cover a fault that appears during loaded production.
- Restore the working arrangement. Record the repair, settings and components changed. Run with the normal guards and approved controls in place.
- Repeat the original trigger condition. Follow several belt circuits for a belt-related event, repeat the permitted start sequence for a start-related event, or run the troublesome normal material condition. Choose the observation period to include the event’s original recurrence pattern.
- Challenge detection with controlled targets. Use identified test pieces and the required metal types, shapes and positions at working speed and load. Include the difficult target position identified for that sensor layout. Secure, introduce and recover test pieces through an approved method so none can reach the protected machine.
- Follow the complete response. Observe detection, the output received by the control system, and the actual alarm, stop, marker or reject action. If automatic removal is used, verify that the target is captured and recovered. If the belt stops, verify that the target remains upstream of the protected equipment.
- Compare like operating exposure. Record running hours or processed quantity, alarm events, recovered metal and target-test results. Compare runs with similar material and operating states; keep confirmed metal events separate from unresolved events.
Set the acceptance criteria from the line’s protection or inspection requirement. Record the number of target passes and results individually. Neither a low event count nor a single successful pass establishes performance over conditions that were never tested.
Keep the results with the original alarm record. This makes a future recurrence easier to investigate and shows whether the same cause returned after another belt repair or process change.
What is the practical fix for conveyor metal detector false alarms?
Find the event source, use the operating pattern to isolate the cause, repair that cause, and retest the required metal with the full line response. Belt-related repeats, machine-related interference and loaded-material changes need different investigations. The working result is fewer unexplained interruptions with the required detection still intact.
Send us the conditions behind the alarm
For a Corvelan installation or a replacement review, send the detector model, alarm message and times, current settings, material, belt width and speed, normal and peak material depth, belt construction and splice details. Include the target metal, what the line should do after detection, and photos or a drawing showing the sensor, nearby metalwork and electrical equipment.
Use our contact form to describe the problem and the conveyor conditions. We can then discuss the detector layout and configuration against the job you need it to perform.
Frequently asked questions
Is the metal always beside the detector when the belt stops?
No. The belt can move after detection, carrying the suspect material downstream. Use the installed marker or the measured stopping movement to locate it. If the target can reach the protected machine before the stop is complete, the detector location or line response needs correction.
Does finding nothing with a magnet mean the alarm was false?
No. A magnet will not recover every metal that a suitable detector may detect. Aluminum, copper and some stainless steel may remain in the material. Preserve the suspect portion and investigate it using a method suited to the target metals.
Will a slower belt always reduce false alarms?
No. Slowing the belt changes the time between belt-related events and may also change vibration or material presentation. It can help compare causes, but stable operation at a slower speed does not establish performance at the required production speed. Include the full stop or reject response in any speed-change test.
Should we replace the belt before calling for service?
Replace it only when the belt or splice has been identified as the cause and cleaning or a suitable repair cannot resolve it. Send the belt construction and repair details first. A new belt with different conductive content or metallic fasteners may introduce another compatibility problem.
Should we immediately relearn the material after rainy weather?
First separate changed material conditions from wet buildup, mechanical changes and an enclosure or cable fault. Record the wetter feed condition and the alarm pattern. If material compensation needs adjustment, use representative normal feed, then repeat detection tests before returning to routine operation.
Can a nearby conveyor cause interference when its motor is off?
Yes. Metal movement and changing contact between conductive parts can disturb a detector even without that motor running. Look for rollers, covers or other metal parts moving nearby. A switched-off motor does not rule out this mechanical or induction-related source.