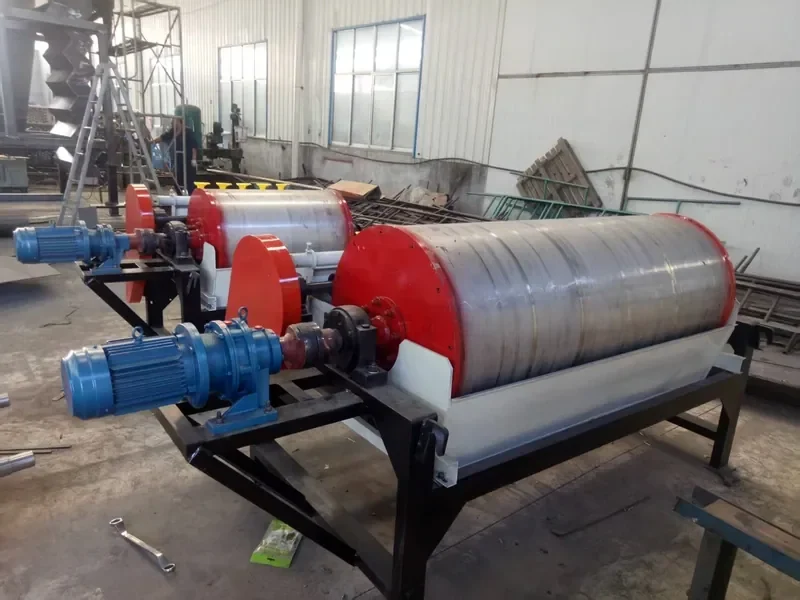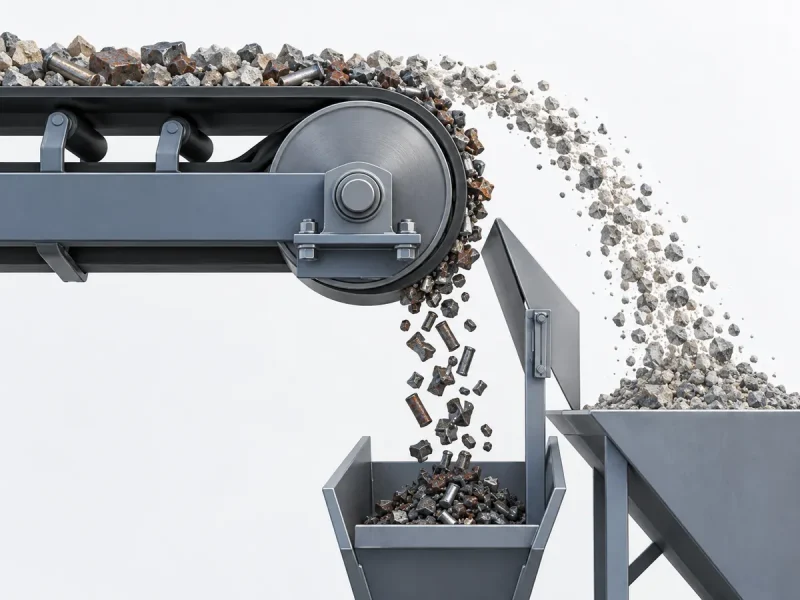
A wet drum startup shutdown procedure should establish drum movement and the required water flow before slurry enters, then stop incoming solids and clear the tank before taking the unit out of service. The exact valve and drive sequence belongs to the installed machine. After a power failure or an incomplete flush, treat the tank as potentially loaded until its condition is known.
The aim is to leave solids with a way out. A tank full of water can still contain a settled bed around the drum, in the feed box or at an outlet.
Why do solids settle when a wet drum stops?
Solids can settle when the flow that carries them through the tank stops or no longer reaches part of the tank. Keeping water above the solids does not, by itself, keep them moving.
Look at where material can remain: the feed box, the space below the drum, tank corners and the concentrate or tailings outlet. An open overflow may carry water away while a deposit remains lower down. This is why an apparently clear discharge needs to be checked against the condition inside the tank.
Magnetic material adds another complication. In a permanent-magnet wet drum, the drive turns the shell around a fixed magnetic assembly. Switching off the motor leaves that magnetic field in place. Material held near the shell therefore needs attention as well as loose solids on the tank floor.
Separate three questions: has fresh feed stopped, can residual solids leave, and is the drum area clear for the next start? A closed feed command answers only the first question—and only if the actual flow has stopped too.
How should you start a wet drum without loading a blocked tank?
Start from a clear, released machine, establish its required operating conditions, and introduce slurry only when both discharge streams can leave freely. Do not use the first feed surge to find out whether yesterday’s solids have cleared.
Before the drive is energized
After a dirty stop, inspect the tank, drum-to-tank space, feed box and discharge areas through the designed access points. A maintenance release should identify any deposit removed and any remaining defect. Restore guards and close access points before operation.
For hands-on inspection, cleaning or obstruction removal, isolate and lock out the drive and connected equipment, prevent unexpected slurry entry, and control stored pressure. Verify the isolation before access. A stop button alone does not provide that protection. The OSHA hazardous-energy overview explains the distinction between stopping equipment and controlling energy during servicing. Permanent magnetic attraction remains a separate hazard around tools and body parts.
Establish the machine, water and receiving conditions
- Prepare the receiving equipment. Make the concentrate and tailings routes available, including pumps or sumps needed to take the starting water. A separator should not be fed into a backed-up outlet.
- Use the installed machine’s drive-and-water sequence. For example, the Eriez CDA instructions on page 11 call for drum rotation, then water services, then feed. A machine that specifies pre-filling needs that step in its own sequence.
- Prove the required conditions. Observe rotation from a safe position. Read the fitted flow instruments and check delivery at the relevant water outlets. Header pressure alone does not show that every branch is flowing.
- Introduce feed in the approved commissioning steps. Watch distribution across the feed box, tank level and both discharge paths before moving to the normal operating load.
- Compare with the accepted operating record. Record speed, water flow, slurry flow or solids rate, slurry concentration and drive current under the same operating state. Stop feed if the liquid level rises abnormally. Stop the drive as well if the drum scrapes or stalls; investigate under isolation before another start.
Keep the machine’s speed, water settings, level and drive limits together on its operating sheet. Values from another manufacturer’s drum are not settings for a Corvelan unit.
How should you shut down and clear the wet drum tank?
For a planned stop, remove the incoming solids load first, complete the machine’s clearing cycle, and then finish its drive-and-water shutdown sequence. Keep a safe receiving route available throughout the clearing cycle. This is a normal operating flush with guards in place; manual cleaning is a separate, isolated job.
The Eriez CDA installation and operating manual, page 11, specifically describes cutting off feed, washing residual solids from the tank, and switching injector water off last to avoid solids backing into its lines.
- Stop solids entering the separator. Identify the actual source: a feeder, pump, gravity line or upstream tank. Allow for slurry still travelling to the feed box after a stop command. A stopped pump does not necessarily stop a gravity-fed return.
- Keep the clearing route open. During the approved run-on, keep the drum carrying residual magnetic material toward its discharge while water carries loose solids out. Route washings to the intended sump or recovery system. Keep receiving pumps within their own operating limits as the solids load falls.
- Observe the cleanout result. Watch whether solids continue to leave, whether the tank level falls or holds as intended, and whether one outlet is backing up. Do not keep adding water to a blocked receiving system.
- Complete the specified final sequence. On a unit with injector water, retain that service until the applicable clearing and backflow conditions have been met. Use the machine’s instructions for the final drive stop and any other water valves; do not assume all water services can be shut together.
- Leave a clear handover. Record whether clearing was completed, whether the tank was drained or left wet, and whether inspection or deposit removal is still required before restart.
What shows that flushing is complete?
Use a clearing condition established during commissioning, backed by inspection of the places where solids remain. Clearer water at one outlet is useful evidence, but it does not show the whole tank is clean.
During a controlled planned stop, record the feed cutoff, actual flush flow and discharge condition. After stopping and isolating the equipment, inspect the tank floor, feed box and accessible drum-to-tank area. If a deposit remains, identify whether water missed that area, fresh slurry continued to enter, or an outlet restricted removal. Correct that cause before repeating the trial.
Once an effective cycle has been demonstrated, its recorded conditions can guide routine stops. A change in particle size, slurry concentration, available water or outlet arrangement calls for reviewing that cycle. Do not assign a universal five- or ten-minute flush to every wet drum.
What changes after a power failure, loss of water or trip?
An interrupted clearing cycle is an unfinished stop, not permission for an automatic restart. Keep slurry feed inhibited until the tank, drive, water supply and receiving system have been released for operation.
If there is an immediate danger, use the emergency stop and the site’s emergency response. Do not delay an emergency stop to finish flushing. Once the hazard is controlled, establish what continued flowing and what stopped.
| What happened? | First decision | Before feed returns |
|---|---|---|
| Complete power failure | Assume the normal run-on did not finish. Water may also be unavailable if its pump lost power. | Check for residual feed, deposits and affected slurry pumps or lines. Restore utilities without automatically releasing feed. |
| Required process or flushing water fails | Stop the solids feed. Do not continue production merely because the drum still turns. | Restore the water service, inspect for buildup, and complete the applicable clearing or cleaning route. |
| Drum stalls or trips | Keep feed off and the drive stopped. Do not repeatedly reset the trip. | Use isolation to investigate obstruction, rubbing or the reported drive fault. Release the machine before a controlled start. |
| Concentrate or tailings cannot leave | Stop feed and prevent further flooding. Additional wash water needs an available receiving route. | Clear and prove the affected route, then deal with material left in the separator. |
If solids have already settled in the tank
Remove an obstruction before trying to restart the drive. A soft starter limits how the motor starts; it does not establish that a packed gap is clear. Increasing a drive’s torque limit or repeatedly jogging the drum is not a cleanout method.
Have the isolated machine inspected through its designed access. Use the specified draining, flushing or deposit-removal method for that tank. If the normal flow path is blocked, adding more water from above may simply raise the level. Restore a controlled discharge path before attempting a cleaning flush.
Include connected equipment in the investigation. Weir Minerals’ mill-circuit pump paper, pages 5–6, describes how an unexpected stop can leave settled solids inside pumps and pipelines. A clear separator tank does not establish that its feed or discharge pump is clear.
After removal, inspect for rubbing damage or displaced parts, close the access points, and return through the normal start-up sequence. If the drum still drags with the tank clear, investigate the mechanical fault rather than adding slurry.
How can you prove the stopping cycle prevents buildup?
Compare the recorded stopping sequence with the deposit found afterward, then confirm that the next controlled start is normal. Use a supervised commissioning or planned-stop trial; do not create an uncontrolled power failure to test the plant.
Start with the original records, not just an operator’s summary that the unit was “washed.” Useful evidence includes:
- The control-system event log: feed stop, valve changes, drum stop, water loss and trips, with timestamps.
- The actual slurry condition before stopping: particle-size information, solids concentration, feed flow or solids rate, and any recent surge.
- Water flow at the relevant branches, receiving-sump level and the condition of both discharge streams during clearing.
- An inspection record made after isolation, showing the location and extent of deposits and whether access for removal was adequate.
- Drive current, speed, noise and tank level during the subsequent start, followed by feed, concentrate and tailings samples once conditions stabilize.
Use a flowmeter to record water delivery and the drive display or plant historian to record current and speed. Safe fixed viewing points help compare outlet behavior. Any timed collection used to measure flow needs a designed sampling point, with no reaching into the running equipment.
When a longer flush still leaves solids
Investigate where the water and solids travel before extending the timer again. A longer cycle cannot correct an area that receives no effective clearing flow.
Suppose a shutdown leaves a deposit at one end of the tank while the visible outlet water looks clear. The first explanation might be “not enough flushing time.” Compare branch delivery and the feed cutoff record, then inspect that end after isolation. A blocked branch, a restricted outlet or continuing gravity feed would each require a different correction.
If water reaches the area and incoming feed has stopped, compare the new material with the last successful stop. A coarser fraction, higher solids load or changed slurry behavior may require a different clearing arrangement. Trial the revised method under controlled conditions and inspect again.
Use several observations together. Normal motor current does not rule out a deposit away from the drum. A clean-looking tank does not prove the separation result after restart. Keep the mechanical release and the stabilized product-sampling result as separate entries.
What should the tank and controls provide for reliable stops?
Specify how the machine stops when a required service fails, how remaining solids can leave, and how operators can confirm a safe restart. Access and shutdown logic deserve the same attention as normal throughput.
For a new line or a retrofit, mark these items on the tank drawing, water diagram and control description:
- Clearing and draining paths: identify the low areas, cleanout access and destination for washings. Confirm that receiving equipment can take the clearing flow.
- Separate water duties: identify process dilution, concentrate spray and any injector or repulping branch actually fitted. Give each a clear operating purpose and shutdown condition.
- Feed permission: define which proven conditions allow slurry in—such as drive running, required water available and downstream ready—and what happens when one is lost.
- Power-loss response: distinguish valve fail position, gravity drainback and water that depends on an electric pump. If emergency flushing is proposed, establish its independent supply and an available receiving route.
- Restart release: define when inspection is required, who releases the unit, and how a restored power supply is prevented from starting feed unexpectedly.
These are items to agree for the project, rather than features to assume from a model name. Our CTS(N.B.) wet drum magnetic separator page explains how tank arrangement, water connections, drive and control interfaces are selected for the application.
A useful wet drum startup shutdown procedure makes the starting conditions, clearing result and interrupted-stop response explicit. Stop solids first for a planned shutdown, clear the residual load through an available route, and hold restart when the tank’s condition is uncertain.
For a Corvelan wet drum project, put the material, normal and peak slurry flow, solids concentration, available water and stopping problem in your message. Include the model or drawing reference if available. Send your wet drum operating requirements so we can discuss the tank and control interfaces relevant to your line.
Wet drum start-up and shutdown FAQ
Can we leave slurry in the tank during a short break?
Do not assume a short break is safe just because the slurry stays wet. Use a hold mode demonstrated for that material and machine, with its required flow, drum operation and downstream services available. If that mode has not been established, use the normal clearing shutdown. Break length alone does not determine whether a deposit will obstruct restart.
Can recycled process water be used for the shutdown flush?
Use it only when its solids content, chemistry and flow suit the installed water service. Solids-bearing water can add material during a cycle intended to remove it, and small passages may need cleaner water. Identify which branches accept recycled water and compare the resulting deposits during commissioning before substituting it for the specified supply.
What if header pressure is normal but one spray or injector has no flow?
Treat the missing branch flow as a fault even when the header gauge looks normal. Stop feed if that branch is required. Before clearing its strainer, nozzle or line, isolate and depressurize the service; also isolate the drive and connected feed wherever access enters the machine’s hazard area. After restoring it, prove delivery at the branch and complete any interrupted clearing cycle before feed returns.
Does a power failure release material held by the magnet?
No, not on a permanent-magnet wet drum. Losing drive power stops shell movement but leaves the magnetic field in place. Include material held near the shell in the restart inspection and keep ferrous tools controlled during service. An electromagnetic machine needs its own power-loss instructions.
Should we open the drum-to-tank gap if startup is difficult?
Do not change the operating gap to compensate for packed solids. Remove deposits and investigate rubbing or misalignment first. Gap changes affect the separation geometry and must follow the installed machine’s drawing and approved adjustment method; they are not a substitute for an effective clearing cycle.
What if the drum restarts normally but concentrate quality is poor?
Separate mechanical restart from stable separation. Check that feed flow, solids concentration, water delivery and tank level have returned to the recorded operating condition. Then compare representative feed, concentrate and tailings samples. If quality remains poor under stable conditions, investigate feed changes, distribution and machine settings rather than assuming the stopping cycle is the only cause.