Use a metal detector product changeover checklist whenever product size, recipe, packaging or line conditions change. Recheck the product setup, then prove that the new product meets the required metal detection target and that the complete stop or reject action works.
A familiar product code is not enough. A larger pouch may pass through the same opening but reach the rejector differently. A saltier recipe may create a different detector signal. You need to check both the product signal and what happens to the suspect product after detection.
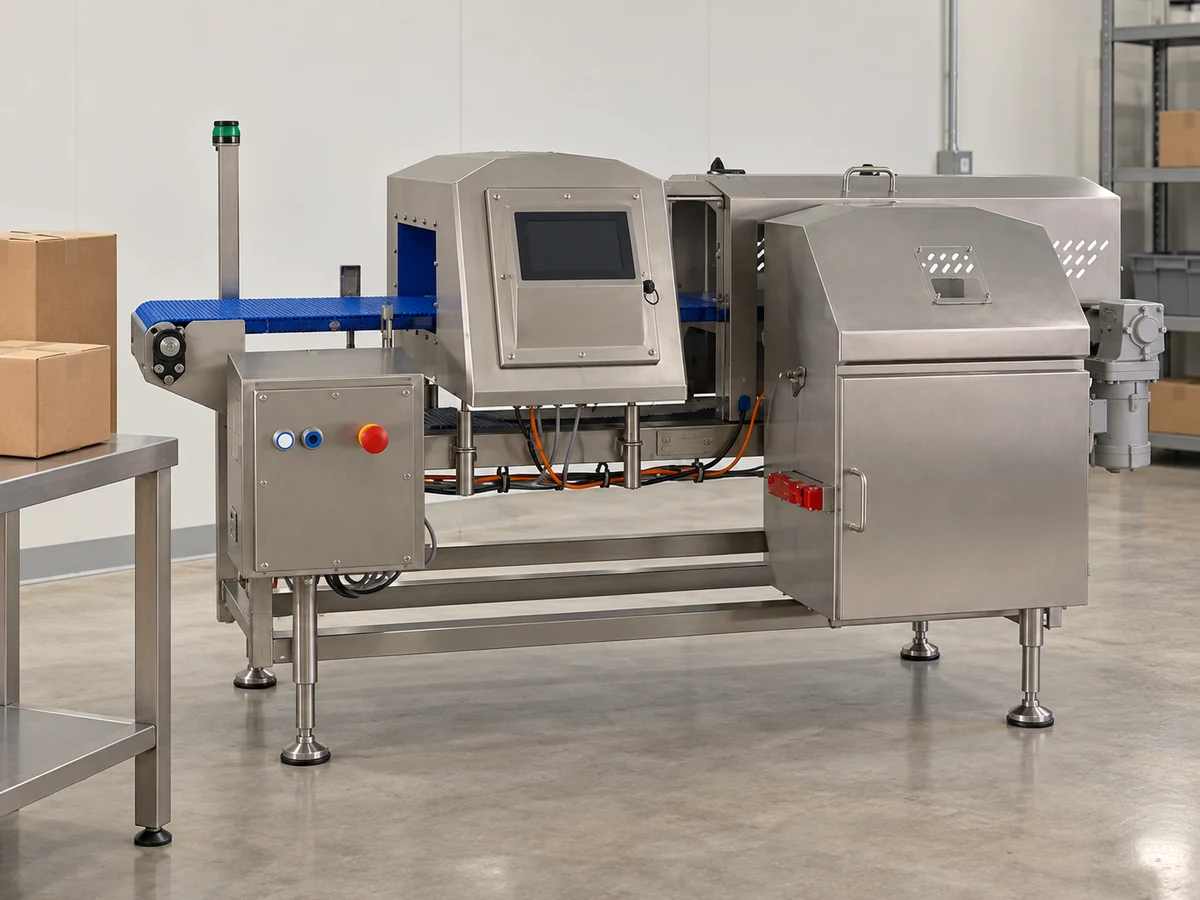
This guide covers inline detectors that inspect products moving on a conveyor, including our LJT-F application. Pumped pipeline and gravity-fall systems need their own transport and reject checks.
What must you recheck before the next product run?
Compare the next product with the last approved setup. Recheck each changed condition, and complete a product-specific detection and response test before releasing the new run. Returning to a previously approved product still requires the correct setup and a successful changeover check.
Start with the previous run record, the new product specification and actual finished packs. The following checks connect each change to the part of the inspection system it can affect.
| What changed? | What to recheck | What the check must establish |
|---|---|---|
| Pack width, height, length or weight | Opening clearance, guides, transport and reject movement | The largest pack passes safely and the rejector handles the new pack. |
| Recipe, moisture, salt or product temperature | Approved detector settings and product signal with representative new product | Normal product variation does not prevent the required metal detection. |
| Film, tray, closure or label construction | Conductive materials and complete finished-pack performance | The new packaging remains suitable for the inspection method. |
| Belt speed, spacing or output | Product tracking, stop distance or reject timing and recovery | Suspect product is isolated at the intended production conditions. |
| Cleaning, guide adjustment or maintenance | Buildup, belt tracking, nearby metal, sensors and restored settings | The physical setup is ready for a new product test. |
Keep the last successful old-product test and the first successful new-product test tied to their batch boundaries. That makes the affected production interval traceable if either check fails.
Will the new size and packaging still suit the detector?
The new product must pass safely through the opening and remain suitable for the detector’s inspection method. Fitting through the tunnel does not establish detection performance.
Measure the finished pack in its normal position
Measure maximum width, height and length, including seals, folded corners and normal bulging. Record weight as well: a heavier pack may need a different reject action even when its outside dimensions stay the same.
Use the real travel position. A pouch can lean, a tray can turn and an uneven product can rise on a transfer. Observe these movements with guards in place. If the product touches the opening or guides, correct its presentation before testing detection.
Do not move metal guides toward the detector simply to hold a narrower pack. Their position must respect the detector’s specified metal-free zone—the space needed around the sensing area to avoid interference. Isolate the equipment before making mechanical adjustments.
Identify what the new packaging contains
A change from plain plastic to metallized film or an aluminum tray needs an application test with the complete new pack. These materials are electrically conductive and can affect inspection. Solid aluminum foil and thin metallized film are different constructions; a setting that works with one cannot be assumed to work with the other.
If the new pack is outside the existing application approval, resolve the inspection method before production. Depending on the required metal types, options may include a suitable detector technology or inspection before metal packaging is added. Review contamination risks after that earlier inspection point as part of the change. If the target includes non-ferrous metal or non-magnetic stainless steel inside solid foil, do not assume a ferrous-in-foil detector can meet that all-metal inspection task.
Should you change the detector program after a recipe change?
Use settings approved for the new product and its actual condition at inspection. A recipe change calls for a fresh review; it does not automatically require a different setting if the existing setup has already been shown to cover that change.
The production recipe code and the detector’s product program are separate records. Match the product name, size, packaging and recipe revision to the approved detector setup. Where settings are entered manually, record the values rather than relying on a product name alone.
Use product from the conditions the detector will actually see
Wet or salty products can create a signal even without metal. This is called product effect. Temperature and product size can change that signal too. A new recipe can therefore cause normal packs to reject or make small metal harder to distinguish.
Use representative product from the new run, including the expected variation in fill and temperature. Measure product temperature at the inspection point using your site’s measurement method, and record where it was measured. A freezer setpoint or oven setting does not describe the pack as it passes through the detector.
For example, if frozen portions can partly thaw while waiting upstream, include that condition in the application review. Thermo Fisher’s discussion of meat inspection explains how thawing changes the product signal. Testing only a fully frozen start-up sample can miss that variation.
Treat setup and performance testing as separate steps
If your installed controller provides a product-learning routine, follow its setup method with suitable uncontaminated product. Keep metal challenge pieces out of that learning step unless the documented method specifically calls for them. Then run the separate performance tests with the required test pieces.
Do not lower sensitivity simply to make the new product run quietly. Any authorized setting change must still pass the required metal detection and line-response tests. If stable operation and the agreed detection target cannot both be met, hold the application for a technical review.
How do size, spacing and speed change rejection?
Recheck rejection whenever pack length, weight, belt speed or spacing changes. The same packs per minute can require a different belt speed and leave less time for the rejector to recover.
Measure pack length in the direction of travel and the clear gap between consecutive packs. Record belt speed separately from the production counter. Use the commissioned belt-speed readout or a safe non-contact speed measurement, rather than deriving speed from the pack count. If fitted, check that the product sensor sees each new pack reliably and that the speed signal matches belt movement.
Why the same output can produce different timing
Consider this teaching example with evenly spaced packs and no slipping. Both runs produce 100 packs per minute. The tracking point is 0.60 m before the reject position.
| Input or result | Previous run | New run |
|---|---|---|
| Pack length | 200 mm | 300 mm |
| Clear gap | 100 mm | 60 mm |
| Belt speed | 30 m/min | 36 m/min |
| Output: speed ÷ (length + gap), using meters | 30 ÷ 0.30 = 100 packs/min | 36 ÷ 0.36 = 100 packs/min |
| Travel time over 0.60 m | 0.60 ÷ (30 ÷ 60) = 1.20 s | 0.60 ÷ (36 ÷ 60) = 1.00 s |
| Time represented by the clear gap | 0.10 ÷ 0.50 = 0.20 s | 0.06 ÷ 0.60 = 0.10 s |
If a fixed waiting time stayed at 1.20 seconds, the new belt would move 0.72 m during that wait—120 mm beyond the example reject position. The smaller gap also halves the time between the trailing edge of one pack and the leading edge of the next.
These are transport calculations, not controller delay settings. The actual sequence depends on where tracking starts, when the detector signals, any speed compensation, and how long the reject device takes to move. Establish those points from the installed control sequence before adjusting settings.
Then test the new packs at the intended speed and smallest permitted gap. Check complete removal, return movement and the next pack. A wider reject window can remove adjacent good product, while an unproven shorter window can leave suspect product on the line.
How should you test the new product before release?
Test the complete inspection system with the new product, required metal test pieces and intended line conditions. A detector alarm alone is not a successful rejection test. Keep all test packs controlled and out of saleable product.
- Prepare the line. Remove previous-product residue, restore guides and guards, select the approved setup and prepare the reject collection area. Make mechanical adjustments only with the equipment safely isolated.
- Run the empty belt. Observe faults or unexplained detections. If these remain, investigate the belt, nearby metal, mounting and electrical interference before trying to compensate through product settings.
- Run suitable uncontaminated new product. Use the actual packaging, presentation and expected product conditions. Investigate unexpected rejections; do not assume every rejected pack is a false reject.
- Challenge each required metal type. Use identified test pieces with known material and sphere diameter. For an all-metal inspection program, cover its specified ferrous, non-ferrous and stainless-steel challenges separately. Use the approved sizes and repeat count; record each result.
- Test the relevant positions with product. Secure the test piece in or with a clearly marked pack using the accepted test method. Include the least-sensitive part of the inspection path, commonly near the center of the opening, and the required positions along the pack.
- Prove the physical response. On a reject line, observe the complete challenge pack entering the controlled reject area. Check normal product before and after it, and consecutive challenge packs where the operating pattern requires this. On a stop-on-detect line, establish that the suspect product remains within the controlled recovery area after stopping.
- Complete the installed fault checks and recover test materials. Check relevant reject confirmation, air-pressure, bin or stop interlocks using the safe test procedure for the fitted hardware. Account for every test piece and marked pack before release.
Keep two position checks distinct: left, center and right describe the path across the opening. Leading, middle and trailing describe where the metal sits along the moving pack. A center-of-opening test does not by itself establish correct rejection when contamination is near either end of a long pack.
LOMA’s metal detection guide emphasizes using representative test packs and observing that the challenge reaches the reject bin. An old test pack whose temperature or condition differs from the new run is a poor substitute.
Start-up checks should also cover the conditions permitted later in the run. If speed changes, packs can queue or product warms while waiting, test the relevant operating limits before treating those conditions as approved.
What should you do if a changeover test fails?
Do not release the new run after a failed required challenge or an incomplete stop or reject action. Control any potentially affected product, find the failed part of the sequence and repeat the relevant tests after correction.
| What you observe | What to investigate first | What must pass afterward |
|---|---|---|
| Empty belt triggers detections | Belt contamination, changed metalwork, vibration or electrical noise | Stable empty-belt operation, followed by the new-product challenge sequence |
| Normal new packs reject | Actual contamination, wrong product setup, packaging or product condition | Representative acceptable product and the required metal challenges |
| Ferrous passes but stainless steel fails | Correct stainless test piece, position, product condition and detection setup | Every required metal type; a ferrous result cannot replace a stainless result |
| Alarm occurs but the pack stays on the line | Tracking, timing, reject movement and fitted sensors or air supply | Complete isolation of the challenge pack at production speed and spacing |
| A slow test passes but the intended run fails | Speed input, presentation, pack gaps and reject recovery | The intended operating conditions, or a formally approved restricted operating range |
| Cold start-up passes but later warm product fails | Temperature range and the product signal covered by the setup | The permitted product-temperature range, including the condition that failed |
Use the last valid successful test, the setup-change time and batch records to identify product that may have passed without effective inspection. Keep it on hold for the site’s quality team to assess. If the boundary cannot be established, extend the hold to cover the uncertainty rather than guessing which packs were safe.
Record the failed result before making a correction. A later pass does not erase the failure or release held product. After a repair or adjustment, repeat the affected checks and the required complete-system test, then record the disposition of the held product separately.
What belongs in the changeover and release record?
The record should show what changed, which setup was used, what was tested and who authorized release. Keep detection results separate from the observed stop or reject result.
Use the following fields in your paper or electronic changeover log. Record actual observations; an unknown value should remain marked as unknown until resolved, rather than being entered as zero.
| Record field | What to enter |
|---|---|
| Equipment and run boundary | Line and detector ID; previous product and batch; last successful old-run test; new batch and first inspection time |
| Product change | Previous and new SKU/recipe revision, maximum pack dimensions, weight and packaging construction |
| Inspection conditions | Measured product temperature and measurement location; relevant moisture/salt changes; belt speed, smallest permitted gap and presentation |
| Settings and physical setup | Detector program or manual settings; revision; any guide, sensor, timing or response changes; person making the change |
| Each challenge | Time; metal type and sphere diameter; test-piece ID; position; repeat number; detection result; physical response result |
| Exceptions | Failed result; affected product boundary and hold reference; corrective action; retest results; held-product disposition |
| Release and continued checks | Approved product/operating range; release time; operator and authorized release person; next scheduled check |
For each challenge, separate “detected” from “pack entered reject area” or “belt stopped with suspect product retained.” This prevents an alarm check from being mistaken for a successful full-system test.
Release the run only when all required challenges and installed response checks pass, test materials are accounted for, and the person responsible under the site’s procedure authorizes operation. Keep routine checks active during production; the changeover record does not replace them.
A useful metal detector product changeover checklist ends with evidence: the new product runs under the approved conditions, every required metal challenge is detected, and suspect product is reliably isolated. If either detection or the physical response fails, keep the run on hold until correction and successful retesting.
For a conveyor application, our LJT-F conveyor metal detector is reviewed against the product, opening, packaging, speed and required line response. Alarm, stop, marking and automatic rejection arrangements depend on the project configuration.
Use the message field on our Contact Us page to send the old and new product conditions, pack dimensions, belt speed, gaps, required metal test pieces and what failed during the check. Include the line layout details so we can review the application and response arrangement.
Product changeover FAQs
Can several pack sizes use the same detector program?
Yes, if the approved testing covers those sizes and their operating conditions. Group products by demonstrated inspection performance, not just by recipe name. The largest pack is not automatically the only difficult case: presentation, temperature, spacing and reject behavior can make another size more demanding.
Do we need a new setup when only the printed label changes?
A purely visual artwork change may remain within the existing approval if the label material, adhesive, closure and pack construction stay the same. Establish that equivalence and carry out the applicable run checks. A new metallic ink, foil feature or conductive layer needs a packaging review and testing rather than being treated as artwork alone.
What if the next batch is shorter than the normal testing interval?
Complete the required start-up/changeover check before release and the end-of-run checks defined for that batch. A short run must not slip between scheduled tests without evidence of control. Set additional checks through the site’s inspection plan and customer requirements; there is no single interval that fits every product and process.
Does the same product need checking again after wet cleaning?
Yes, complete the applicable post-cleaning restart checks even if the product code has not changed. Restore the belt, guides and fitted sensors, inspect for residue or water where it should not remain, and let the equipment reach its specified operating condition. Then perform the required product challenge and response tests before release.
Who can release the line if QA is not physically present?
Only a person given that responsibility by the site’s documented procedure should release it. This may be a trained, authorized production employee where the procedure permits it. Decide the responsibility and escalation route before the changeover; lack of an available approver is not a reason to bypass a failed or incomplete check.