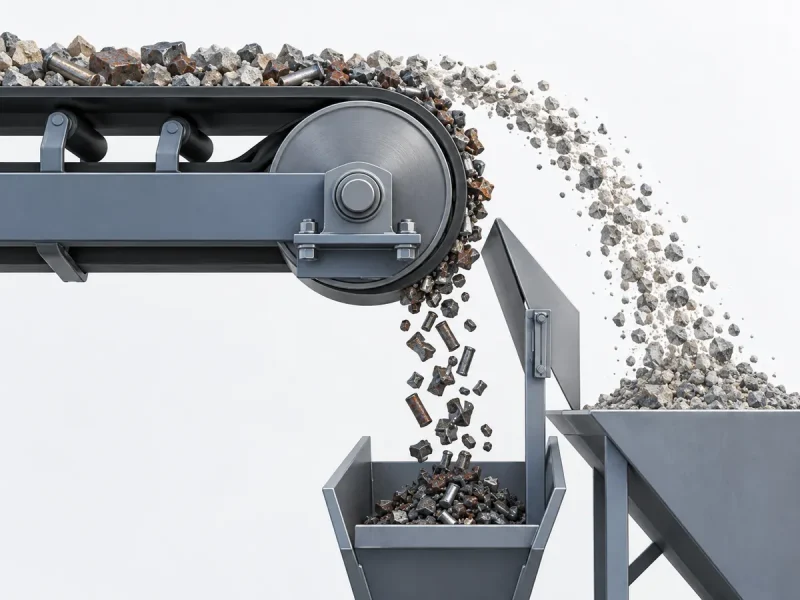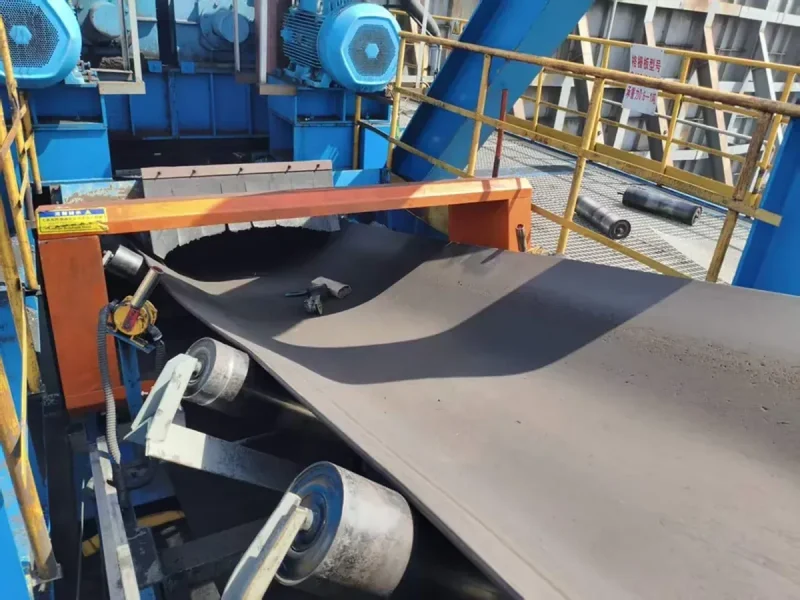
Overband magnet maintenance keeps the cleaning belt, pulleys, bearings, drive, suspension and iron discharge path working together. Self-cleaning means the belt removes captured iron automatically. It does not remove the need for inspection, lubrication, wear-part replacement or separation checks.
Start with a safe visual check each operating shift, add planned inspections under isolation, and service the actual bearings, drive and cooling system at their specified intervals. Increase attention when sharp steel, dust, heat or longer running hours change the duty. After repairs, verify both steady belt running and successful iron discharge.
How often does an overband magnet need maintenance?
Use three schedules together: shift observations, planned inspections with the equipment isolated, and component service based on operating hours or calendar time. A new noise, damaged belt, jam or oil leak triggers attention before the next scheduled visit.
The table below gives a practical starting structure for a site maintenance plan. Set the service intervals against the supplied separator and component instructions, then use condition records to identify checks that need to happen sooner.
| When | What to do | What changes the next action |
|---|---|---|
| Each operating shift | From a safe position outside the guards, observe belt position, noise, visible damage, discharge and dust buildup. | Stop for rubbing, unstable running, trapped steel or another unsafe condition. Record gradual changes for the planned inspection. |
| After a new belt, tracking adjustment or major service | Recheck during the controlled restart and at the run-in points specified for the machine. | Recurring drift calls for a cause check rather than another identical adjustment. |
| At planned isolated inspections | Inspect the full belt, joint, cleats, pulley surfaces, bearings, fasteners, guards, suspension and discharge area. | Heavy contamination, sharp scrap or fast wear calls for shorter inspection intervals. |
| At the bearing and drive service intervals | Apply the specified lubricant, quantity and method; inspect the relevant oil level or transmission parts. | Track running hours as well as dates. Identify sealed bearings before adding grease. |
| After an impact, jam, relocation or change in removal results | Inspect the affected parts and compare mounting position and operating conditions with the previous setup. | Resume normal production only after the fault and its effect on iron removal have been addressed. |
Published schedules show why machine identity matters. The Eriez Model TP SM-308 manual lists daily noise and dust checks, monthly belt checks and quarterly bearing lubrication. The Goudsmit ROEx/SxEB manual, November 2025, calls for daily belt and roller checks and weekly lubrication of specified bearings, while identifying other bearings as maintenance-free. These are instructions for different machines and bearing arrangements.
For a magnetic separation line with several machines, keep one inspection route but separate service tasks for each asset. A drum bearing, an overband cleaning belt and a metal detector do not share the same wear mechanism. If sharp rebar starts arriving where the feed previously contained small bolts, inspect the overband belt sooner and review how the larger pieces pass through the discharge area.
What must be made safe before maintenance?
Stop material feed and isolate the equipment that could move, release energy or drop material into the work area. A permanent magnet remains active after electrical isolation. Reaching through a guard to pull out trapped wire is a maintenance task, not a running inspection.
Before hands-on work, trained personnel should:
- Identify the separator drive, main conveyor, upstream feed and any auxiliary or hydraulic supplies that affect the task. Lock out the relevant energy sources and verify isolation through the site procedure. A stop button alone is not an energy isolator.
- Control stored belt tension, pressure, hot surfaces and suspended loads. If the job involves loosening suspension hardware, provide the engineered support and lifting arrangement before releasing anything.
- Plan for captured iron. An electromagnet can release steel when excitation is removed; keep people out of the drop area before shutdown. With a permanent unit, control ferrous tools and loose parts that can be pulled toward the magnet.
- Provide safe access, task-appropriate protection and controls for anyone with a medical device affected by strong magnetic fields. Keep hands away from pinch points between steel, the magnet and the belt.
In US general industry, the energy-control basis is covered by OSHA 29 CFR 1910.147. The practical aim is to prevent unexpected movement or energy release while people are exposed.
Observe a running belt only from outside the guarded area. Make physical checks and adjustments under isolation, then clear the area and restore guarding for a controlled running check. Repeat that stop–adjust–observe sequence if further correction is needed.
How do you inspect the cleaning belt and correct mistracking?
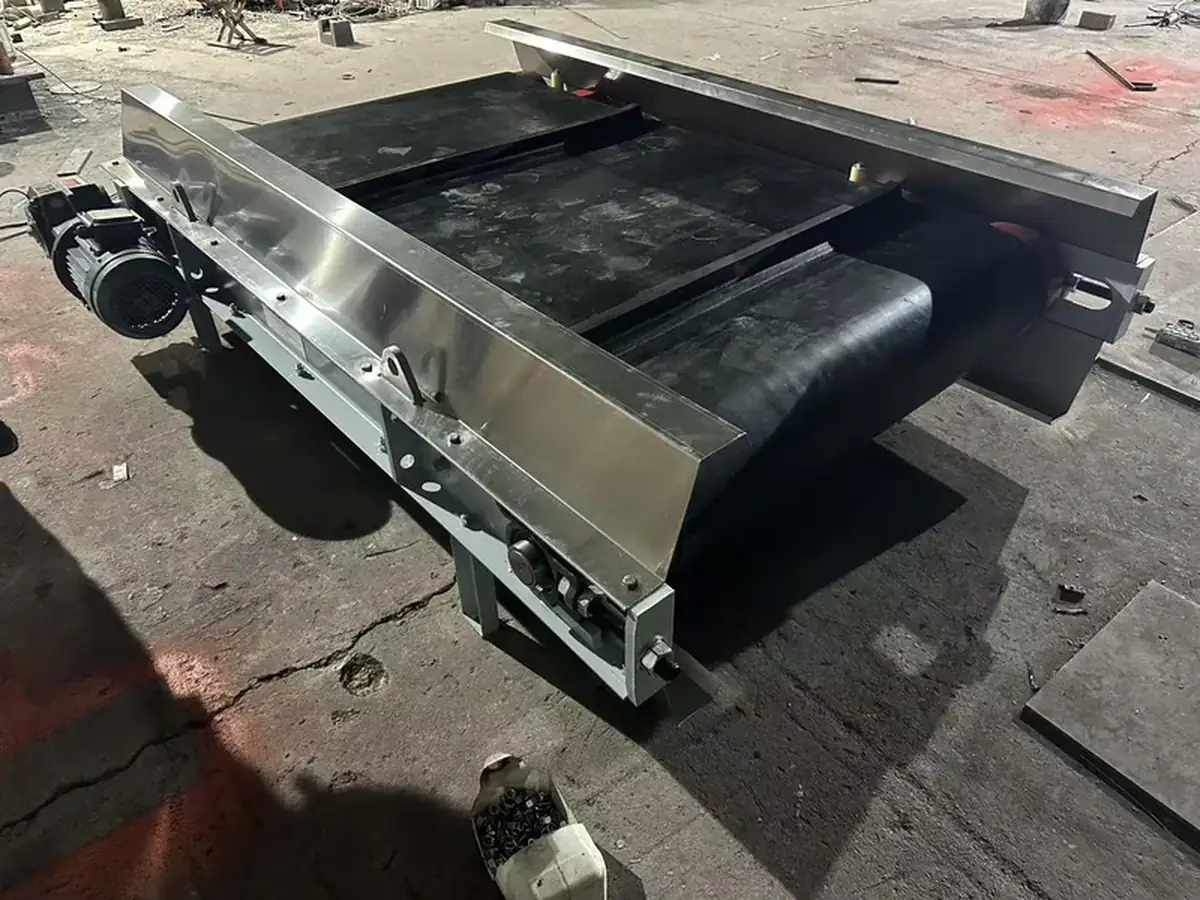
Inspect the belt and the surfaces that guide it before changing the take-up. Persistent mistracking can come from buildup, misalignment, damaged belt construction or uneven iron loading. Tightening the belt will not remove those causes.
Inspect the belt, joint and cleats
Under isolation, examine the accessible belt surfaces and edges. Use the machine’s approved method to present any hidden sections; do not pull a belt around by hand near the magnet or pulleys.
Look for cuts, punctures, exposed reinforcement, edge loss, split joints and loose fasteners at a mechanical joint. Inspect the cleats—the raised strips that carry iron—for cracks, separation or missing sections. Also look for wire or fine debris caught where the belt passes the magnet body or pulleys.
Record where the damage occurs. Wear along one edge points toward a contact or tracking problem. Damage repeating at the joint directs attention to the joint and its passage around the pulleys. Cuts that appear after large scrap arrivals call for a review of impact and discharge clearance as well as belt condition.
Stop for an opening joint, exposed or damaged reinforcement, a tear that is growing, or contact with fixed parts. Photograph the area under isolation and use the belt’s repair or replacement criteria to decide the next step.
Find the cause before changing tension
Use the symptom to decide where to inspect first. This sequence combines belt condition, pulley geometry and the captured-iron path.
| Symptom | Inspect under isolation | Correct the cause and recheck |
|---|---|---|
| Belt consistently moves toward one side | Take-up positions, pulley alignment, frame squareness and fixed-part contact | Restore the approved geometry, then track using the adjustment sequence for that machine. |
| Drift starts after a period of normal running | Deposits on pulley surfaces, trapped objects and wrapped wire | Remove the obstruction safely and investigate how it entered or accumulated. |
| Drift appears mainly with large iron pieces | Uneven loading, cleat condition and clearance to the chute or frame | Correct interference and the discharge path before making further tracking changes. |
| Drift starts after belt replacement | Belt dimensions, joint alignment, installation direction and pulley condition | Correct the replacement or assembly problem, then set tension and tracking again. |
Set tension with the specified measuring method for the installed belt and pulley arrangement. The belt must move captured iron without slipping, while retaining its designed running clearance and sag. Do not tighten it simply to make the underside look flat against the magnet. Excess tension loads shafts and bearings and can damage them.
The Eriez Model TP maintenance manual explains the relationship between tracking, belt sag and over-tensioning. For your machine, record the approved tension reference and take-up positions so the next technician has a useful baseline.
What should you check on bearings, pulleys and the drive?
Look for changes in noise, temperature, vibration, leakage and movement, then relate them to belt load and recent adjustments. A hot bearing after tensioning needs a mechanical check; repeatedly adding grease can leave the cause untouched.
At isolated inspections, examine pulley surfaces, bearing housings, mounting bolts and drive supports. Look for rubbing marks, loose parts, damaged seals and oil leaks. Check transmission guards and any fitted coupling, chain or V-belt using the component’s service instructions.
For useful trend records:
- Measure bearing-housing temperature at the same marked location, using the same non-contact instrument and a comparable running condition. Record ambient temperature and run time with it.
- Note whether noise or vibration starts empty, under captured-iron load, after warming up or immediately after an adjustment.
- Record lubricant identity, quantity, date and machine hours. Keep bearing grease, gearbox oil and electromagnet cooling oil as separate items.
A sudden increase in heat, grinding noise, visible looseness or severe vibration calls for a controlled stop and investigation. Inspect for excessive belt tension, obstruction, alignment problems and bearing damage before deciding on lubrication or replacement.
Identify whether each bearing is relubricable or sealed for its intended service. For relubricable bearings, use the specified grease and quantity; arrange access so servicing does not expose anyone to moving parts. Heat, contamination and shock loading can shorten grease service life, as explained in the SKF bearing maintenance handbook. A temperature trend helps locate a change; the component’s limits determine the response.
How does maintenance differ for permanent and electromagnetic overbands?
Both types need mechanical maintenance. An electromagnetic overband also needs attention to its excitation supply, controls and the cooling arrangement actually fitted. A permanent unit has no magnet excitation circuit, but its cleaning-belt drive still needs power and service.
Our overband magnetic separator range includes permanent designs with automatic iron discharge. When matching maintenance tasks to an installed unit, identify the magnetic source and the drive separately.
| Design | Shared mechanical work | Additional attention |
|---|---|---|
| Self-cleaning cross-belt permanent magnet | Belt, joint, cleats, pulleys, bearings, drive, mounting and discharge | The magnetic field remains active during a power outage or isolated service. Inspect the body for impact or corrosion damage. |
| Self-cleaning cross-belt electromagnetic separator | The same belt and drive checks | Qualified personnel inspect excitation, connections, protective devices, temperature indications and the fitted cooling system. |
For an air-cooled electromagnet, keep its heat-dissipating surfaces and airflow paths clear. For oil-cooled equipment, inspect for leakage and measure the level in the specified machine position and temperature condition. A forced-oil system adds the pump, cooler, hoses and any fitted flow or temperature devices to the maintenance list.
Do not treat the magnet’s cooling oil as gearbox oil. Identify the circuit, fluid specification and fill reference before servicing it. The Goudsmit ROEx/SxEB manual, for example, describes checking magnet oil level after cooling because oil expands when hot.
Electrical fault-finding and internal magnet repairs belong with qualified service personnel. Routine cleaning and inspection should focus on accessible components rather than opening the magnetic enclosure.
Why can iron removal fall after a mechanical repair?
A repair can change the magnet’s position, belt direction, clearance or discharge path even when the new parts run smoothly. First establish where the iron-removal process fails: pickup, transport or final discharge.
If iron stays in the material, compare the current setup with the last accepted operating record. Measure magnet-face height from the same fixed reference and check its position across the conveyor. Record material depth and conveyor speed. For electromagnetic equipment, include excitation and temperature status in the investigation.
If iron is lifted but returns to the product, inspect the cleaning-belt direction, cleats, travel path and collection area. A blocked chute, full bin or changed discharge position can undo successful pickup. Watch the complete path from a protected position rather than judging the job at the magnet face alone.
Bunting’s installation guidance highlights two relevant changes: leaving a magnet raised after a material surge, and moving it to a conveyor whose width or discharge position no longer suits it. Both can reduce removal performance. After maintenance, restore the accepted position or assess the changed arrangement before releasing the line.
Keep a baseline photograph and mounting measurements with the maintenance record. A lower weight of collected iron alone is not enough to diagnose a weak magnet: incoming contamination and processed tonnage can also change. Compare like-for-like conditions and use a controlled target-metal check to investigate the actual removal result.
How do you verify the separator after maintenance?
Release the separator only after the repaired parts run correctly and the required iron-removal result has been checked under defined conditions. Use separate mechanical and separation checks so a smooth-running belt does not hide a pickup or discharge problem.
- Prepare for restart. Account for tools and removed parts. Secure fasteners, guards and covers; clear personnel from the belt and iron-drop areas. Restore and test safety functions through the authorized restart procedure.
- Run a controlled empty check. Observe belt direction, tracking, clearance, noise and drive behavior from outside the guards. Stop and isolate again if rubbing or drift appears.
- Introduce a controlled material load. Observe tracking under load, cleat behavior and discharge into the collection area. Check the repaired bearing or drive against its recorded operating condition.
- Check the separation task. Define the target metal’s material, size and shape, its position in the burden, material depth, conveyor speed, magnet position and number of passes. Use a site-approved test arrangement that keeps people clear and prevents unrecovered test pieces from reaching downstream machinery or product.
- Record the complete result. Log pieces introduced, pieces lifted and pieces recovered in the intended collection area. Record any fall-back, missed pickup or obstruction, together with the agreed acceptance rule and follow-up action.
For example, suppose a controlled check introduces ten identified steel pieces. All ten are lifted, but only nine reach the collection bin. The next task is to locate the missing piece and correct the transport or discharge failure. A pickup-only count would hide that problem. Keep downstream equipment protected while investigating.
Choose test-piece positions to match the job. A convenient exposed bolt on top of a shallow layer does not represent a target buried at the maximum agreed material depth. When comparing with the pre-maintenance result, hold the defined conditions steady and record any differences.
Magnetic measurements can supplement this check when the test points and measuring method are defined. A higher surface reading does not by itself show that the target iron is lifted and discharged at the operating distance.
What maintenance records and spare parts should you keep?
Keep enough detail to connect a symptom with the installed components, operating conditions and the last change. A record that only says “belt adjusted” makes the next recurring fault harder to solve.
For each visit, record:
- Unit identification, date, running hours, material and observed symptom.
- Belt position, damage location, take-up references, lubricant used and parts changed.
- Relevant temperature, noise, leakage and mounting observations, with comparable operating conditions.
- The action taken, restart result, iron-removal result and next due task.
Identify replacement parts from the unit drawing and component markings. For a belt, retain width, length, thickness, construction, joint type and cleat arrangement. For bearings and the drive, retain readable component references. A laced belt and a vulcanized endless belt can need different replacement work and downtime.
Where belt damage has stopped production and replacement lead time is long, consider keeping the correct belt and joint parts on site. Use the observed failure pattern to choose spares rather than ordering a generic kit that may not fit.
Effective overband magnet maintenance combines regular observation, correctly planned service and a documented restart result. Shorten checks when conditions become harsher, resolve recurring faults at their cause, and verify that captured iron reaches the intended discharge area.
For a Corvelan unit review, send the equipment identification, symptom, recent changes, operating hours and available component details. Use the Message field on our contact page to describe the issue, or email [email protected] with photos and the relevant drawing. State whether the problem is pickup, belt running or final discharge so we can focus the discussion.
Overband Magnet Maintenance FAQ
Can a permanent overband keep protecting the conveyor while its cleaning belt is stopped?
The magnetic field remains active, but captured iron will no longer be carried away. Accumulation can obstruct the belt area or allow iron to return to the material. Stop feed for a belt-drive fault and resolve it before normal production resumes. Restarting the main conveyor because the magnet still attracts steel leaves the discharge problem unresolved.
Can the whole separator be cleaned with a pressure washer?
Use pressure washing only where the installed equipment and its components permit that cleaning method. A guard does not establish a motor, bearing or control enclosure’s water-ingress rating. Identify the exposed components and the approved cleaning method first. Keep water out of electrical and lubrication systems, and restore the required dry condition before restart.
Should maintenance dates stay the same when the line adds another shift?
Recalculate hour-based service dates and keep calendar-based tasks in the plan. More running hours bring an operating-hour service point forward even if the calendar interval has not changed. Keep the shift observation on every operating shift and review wear or buildup trends under the longer duty.
Does less iron in the collection bin mean the magnet has weakened?
No. Compare incoming material, processed tonnage and operating conditions before diagnosing the magnet. Record collected-iron mass and tonnes processed over comparable periods, then divide mass by tonnage to compare kilograms of collected iron per tonne. A change directs an investigation; use the defined target-metal procedure to check pickup and discharge. Incoming contamination and iron falling back into the product can both change the collection figure.